Amalgomating Machine Tutorial :
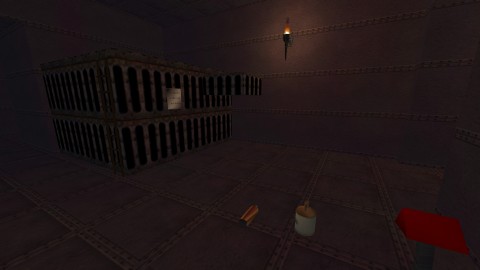
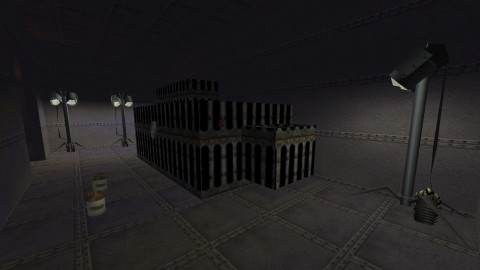
Alright, first off, create what you want to be the machine. This is very simple. Just to be simplistic, create a square solid brush small enough so you can mantle onto it, so you don’t have to make a ladder. Dress it up however you wish, it’s yours to play with. Put an air brush in this solid brush, however big as you’d like, as this doesn’t matter to the Amalgomating machine process. This will be what you throw the things into that you want to be mixed together.
Create another hole if you wish, out of an air brush, or even a chute of some sort. This will be what the product will come out of when mixed, so make sure you put it somewhere that will let the thing fall on the ground so you can go get it. With that done, it’s time to start the hard parts.
Make sure you have all the following scripts loaded : Convict, Gen, miss16.
Now...
You will need the following things :
*A marker (Name it AmalgMachine)
*Another marker (Name it AmalgMachineInput)
*Yet another marker (Name it AmalgOutput)
*One more marker (Name it AmalgOutput2)
*A relay trap
*A button
*An AcidMixture (Look under Manufacture in the hierarchy)
*A QuickLimeMixture (Also in the Manufacture directory, in the hierarchy)
Now we begin.
AmalgMachine
With the AmalgMachine marker, add the property Script (S>Scripts), and in Script0 add "AmalgMachine". (without the quotes) That’s all you need to do here. Now, open up links and add the following Link :
Flavor : ScriptParams
From : AmalgMachine
To : AmalgOutput
Data : 1
And another one...
Flavor : ScriptParams
From : AmalgMachine
To : AmalgOutput2
Data : 2
You’re done with this thing. Let’s move on.
AmalgMachineInput
This is perhaps the most difficult one, as you need to add a few things to it’s properties. So, let’s do that first. Open up properties, and add Attributes (Physics>Model>Attributes) If it’s not like this already, then change everything to be like this, and change nothing else.
Gravity : 100.00
Mass : 30.00
Density : 1.00
Base Friction : 0.96
Time to add something else. In that same category you found Attributes in, add Controls. If it’s not like this already, change it.
Location, Rotation for the button on that thing that popped up.
And Dimensions, but nothing needs to be changed.
And also State, nothing needs to be changed.
Type :
OBB for the top thing.
# Submodels : 6
(NOTE ! After adding Type, you may need to go back and look at the rest to make sure they’re what you want them to look like. The OBB & Submodels thing can change this, which is good.)
Now add a new thing, Misc. It’s in the properties area somewhere, find it ! (Yes, you actually have to put in your own effort here). Add Collision Type : Bounce
Now add Renderer, Transparency property. Set the transparency to 0.01
And also : Renderer Type : Normal.
You’re done with the hardest part. Now, back to normalities, add the Script (S>Scripts) Script0 : "MachineSlot" (no quotes).
Now, with this AmalgMachineInput marker, widen it and fatten it so it’s the same width as your input area. Make it as tall as you wish, but I don’t recommend it being too tall.
With that done, you can now link it to the machine.
Flavor : ScriptParams
From : AmalgMachineInput
To : AmalgMachine
Data : 1
AmalgOutput
Don’t add anything to this.
AmalgOutput2
Nothing here, either.
(Note ! Put these both where you want the item to come out of !)
RelayTrap
Add one link :
Flavor : ControlDevice
From : (Relay trap id #)
To : AmalgMachine
You’re done ! Now all you need to do is create the QuickLimeMixture and the Acidmixture, put them where you can find them, and a button.
With the button, add this link :
Flavor : ControlDevice
From : [button id #)
To : (relaytrap id #)
Throw the AcidMixture and the QuickLimeMixture in the slot, push the button, and you’ve got a FlareMixture. Now, you’ve got yourself an Amalgamating Machine that works.
Bellowing Machine Tutorial :
Alright, first off, create what you want to be the machine. This is very simple. Just to be simplistic, create a square solid brush small enough so you can mantle onto it if you wish, so you don’t have to make a ladder. Dress it up however you wish, it’s yours to play with. Put a air brush in this solid brush, however big as you’d like, as this doesn’t matter to the Bellowing process. This will be what you throw the things into that you want to be bellowed.
Create another hole if you wish, out of an air brush, or even a chute of some sort. This will be what the product will come out of when it’s been bellowed, so make sure you put it somewhere that will let the thing fall on the ground so you can go get it. With that done, it’s time to start the hard parts.
Make sure you have all the following scripts loaded : Convict, Gen, miss16.
Now...
You will need the following things :
*A marker (Name it BellowingMachine)
*Another marker (Name it BellowsInput)
*Yet another marker (Name it BellowsOutput)
*A Bantam Node (Look under Manufacture in the hierarchy)
*A FluxSpheroid (Also in the Manufacture directory, in the hierarchy)
Now we begin.
BellowingMachine
With the BellowingMachine marker, add the property Script (S>Scripts), and in Script0 add "BellowingMachine". (without the quotes) That’s all you need to do here. Now, open up links and add the following Link :
Flavor : ScriptParams
From : BellowingMachine
To : BellowsOutput
Data : 1
You’re done with this thing. Let’s move on.
BellowsInput
This is perhaps the most difficult one, as you need to add a few things to it’s properties. So, let’s do that first. Open up properties, and add Attributes (Physics>Model>Attributes) If it’s not like this already, then change everything to be like this, and change nothing else.
Gravity : 100.00
Mass : 30.00
Density : 1.00
Base Friction : 0.96
Time to add something else. In that same category you found Attributes in, add Controls. If it’s not like this already, change it.
Location, Rotation for the button on that thing that popped up.
And Dimensions, but nothing needs to be changed.
And also State, nothing needs to be changed.
Type :
OBB for the top thing.
# Submodels : 6
Now add a new thing, Misc. It’s in the properties area somewhere, find it ! (Yes, you actually have to put in your own effort here). Add Collision Type : Bounce
Now add Renderer, Transparency property. Set the transparency to 0.01
And also : Renderer Type : Normal.
You’re done with the hardest part. Now, back to normalities, add the Script (S>Scripts) Script0 : "MachineSlot" (no quotes).
Now, with this BellowsInput marker, widen it and fatten it so it’s the same width as your input area. Make it as tall as you wish, but I don’t recommend it being too tall.
With that done, you can now link it to the machine.
Flavor : ScriptParams
From : BellowsInput
To : BellowingMachine
Data : 1
BellowsOutput
Add nothing, leave this blank.
You’re done ! Now all you need to do is create the Bantam Node and the FluxSpheroid, and make sure to put them where you can find them. No button is needed, as things will be bellowed immediately without pushing a button. This allows a small degree of laziness, and removing the risk of broken fingers.
Throw the Bantam Node and the FluxSpheroid in the slot, and immediately you’ve got a scouting orb. Now, you’ve got yourself a Bellowing Machine that works.
Fusing Machine Tutorial :
Alright, first off, create what you want to be the machine. This is very simple. Just to be simplistic, create a square solid brush small enough so you can mantle onto it, so you don’t have to make a ladder. Dress it up however you wish, it’s yours to play with. Put an air brush in this solid brush, however big as you’d like, as this doesn’t matter to the fusing machine process. This will be what you throw the things into that you want to be fused together.
Create another hole if you wish, out of an air brush, or even a chute of some sort. This will be what the product will come out of when fused, so make sure you put it somewhere that will let the thing fall on the ground so you can go get it. With that done, it’s time to start the hard parts.
Make sure you have all the following scripts loaded : Convict, Gen, miss16.
Now...
You will need the following things :
*A marker (Name it FusingMachine)
*Another marker (Name it FusingMachineInput)
*Yet another marker (Name it FusingMachineOutput1)
*One more marker (Name it FusingMachineOutput2)
*A relay trap
*A bigfloorlever
*An AcidMixture (Look under Manufacture in the hierarchy)
*A WireSpool (Also in the Manufacture directory, in the hierarchy)
Now we begin.
FusingMachine
With the FusingMachine marker, add the property Script (S>Scripts), and in Script0 add "FusingMachine". (without the quotes) That’s all you need to do here. Now, open up links and add the following Link :
Flavor : ScriptParams
From : FusingMachine
To : FusingMachineOutput1
Data : 1
And another one...
Flavor : ScriptParams
From : FusingMachine
To : FusingMachineOutput2
Data : 2
You’re done with this thing. Let’s move on.
FusingMachineInput
This is perhaps the most difficult one, as you need to add a few things to it’s properties. So, let’s do that first. Open up properties, and add Attributes (Physics>Model>Attributes) If it’s not like this already, then change everything to be like this, and change nothing else.
Gravity : 100.00
Mass : 30.00
Density : 1.00
Base Friction : 0.96
Time to add something else. In that same category you found Attributes in, add Controls. If it’s not like this already, change it.
Location, Rotation for the button on that thing that popped up.
And Dimensions, but nothing needs to be changed.
And also State, nothing needs to be changed.
Type :
OBB for the top thing.
# Submodels : 6
(NOTE ! After adding Type, you may need to go back and look at the rest to make sure they’re what you want them to look like. The OBB & Submodels thing can change this, which is good.)
Now add a new thing, Misc. It’s in the properties area somewhere, find it ! (Yes, you actually have to put in your own effort here). Add Collision Type : Bounce
Now add Renderer, Transparency property. Set the transparency to 0.01
And also : Renderer Type : Normal.
You’re done with the hardest part. Now, back to normalities, add the Script (S>Scripts) Script0 : "MachineSlot" (no quotes).
Now, with this FusingMachineInput marker, widen it and fatten it so it’s the same width as your input area. Make it as tall as you wish, but I don’t recommend it being too tall.
With that done, you can now link it to the machine.
Flavor : ScriptParams
From : FusingMachineInput
To : FusingMachine
Data : 1
FusingMachineOutput1
Don’t add anything to this.
FusingMachineOutput2
Nothing here, either.
RelayTrap
Add one link :
Flavor : ControlDevice
From : (Relay trap id #)
To : FusingMachine
You’re done ! Now all you need to do is create the WireSpool and the Acidmixture, put them where you can find them, and a bigfloorlever.
With the bigfloorlever, add this link :
Flavor : ControlDevice
From : [button id #)
To : (relaytrap id #)
Throw the AcidMixture and the WireSpool in the slot, pull the lever, and take a look at that handy thing you got. Now, you’ve got yourself a Fusing Machine that works.
Linking Machine Tutorial :
Alright, first off, create what you want to be the machine. This is very simple. Just to be simplistic, create a square solid brush small enough so you can mantle onto it, so you don’t have to make a ladder. Dress it up however you wish, it’s yours to play with. Put a air brush in this solid brush, however big as you’d like, as this doesn’t matter to the linking machine process. This will be what you throw the things into that you want to be linked together.
Create another hole if you wish, out of an air brush, or even a chute of some sort. This will be what the product will come out of when linked, so make sure you put it somewhere that will let the thing fall on the ground so you can go get it. With that done, it’s time to start the hard parts.
Make sure you have all the following scripts loaded : Convict, Gen, miss16.
Now...
You will need the following things :
*A marker (Name it LinkingMachine)
*Another marker (Name it LinkingMachineInput)
*Yet another marker (Name it LinkingMachineOutput)
*A button
*A Bantam Node (Look under Manufacture in the hierarchy)
*An InvGauge (Also in the Manufacture directory, in the hierarchy)
Now we begin.
LinkingMachine
With the LinkingMachine marker, add the property Script (S>Scripts), and in Script0 add "LinkingMachine". (without the quotes) That’s all you need to do here. Now, open up links and add the following Link :
Flavor : ScriptParams
From : LinkingMachine
To : LinkingMachineOutput
Data : 1
You’re done with this thing. Let’s move on.
LinkingMachineInput
This is perhaps the most difficult one, as you need to add a few things to it’s properties. So, let’s do that first. Open up properties, and add Attributes (Physics>Model>Attributes) If it’s not like this already, then change everything to be like this, and change nothing else.
Gravity : 100.00
Mass : 30.00
Density : 1.00
Base Friction : 0.96
Time to add something else. In that same category you found Attributes in, add Controls. If it’s not like this already, change it.
Location, Rotation for the button on that thing that popped up.
And Dimensions, but nothing needs to be changed.
And also State, nothing needs to be changed.
Type :
OBB for the top thing.
# Submodels : 6
Now add a new thing, Misc. It’s in the properties area somewhere, find it ! (Yes, you actually have to put in your own effort here). Add Collision Type : Bounce
Now add Renderer, Transparency property. Set the transparency to alpha, 0.01
And also : Renderer Type : Normal.
You’re done with the hardest part. Now, back to normalities, add the Script (S>Scripts) Script0 : "MachineSlot" (no quotes).
Now, with this LinkingMachineInput marker, widen it and fatten it so it’s the same width as your input area. Make it as tall as you wish, but I don’t recommend it being too tall.
With that done, you can now link it to the machine.
Flavor : ScriptParams
From : LinkingMachineInput
To : LinkingMachine
Data : 1
LinkingMachineOutput
This is the simplest part. Add Scripts : Script0 : "LinkingMachine" (no quotes).
You’re done ! Now all you need to do is create the Bantam Node and the InvGauge, put them where you can find them, and a button.
With the button, add this link :
Flavor : ControlDevice
From : [button id #)
To : LinkingMachine
Throw the Bantam Node and the InvGauge in the slot, push the button, and you’ve got a Regulating Round. Now, you’ve got yourself a Linking Machine that works.
Rolling Machine Tutorial :
Alright, first off, create what you want to be the machine. This is very simple. Just to be simplistic, create a square solid brush small enough so you can mantle onto it if you have to, so you don’t have to make a ladder. Dress it up however you wish, it’s yours to play with. Put two air brushes in this solid brush, however big as you’d like, as these don’t matter to the rolling process. These will be what you throw the things into that you want to be rolled out.
Create another hole if you wish, out of an air brush, or even a chute of some sort. This will be what the product will come out of when rolled together, so make sure you put it somewhere that will let the thing fall on the ground so you can go get it. With that done, it’s time to start the hard parts.
Make sure you have all the following scripts loaded : Convict, Gen, miss16.
Now...
You will need the following things :
*A marker (Name it RollingMachine)
*Another marker (Name it RollingInput1)
*Again, a marker (Name it RollingInput2
*Yet another marker (Name it RollingOutput)
*A button
*A FlareMixture (Look under Manufacture in the hierarchy)
*A PlateO’Metal (In the Manufacture directory, in the hierarchy)
Now we begin.
RollingMachine
With the SealingMachine marker, add the property Script (S>Scripts), and in Script0 add "RollingMachine". (without the quotes) That’s all you need to do here. Now, open up links and add the following Link :
Flavor : ScriptParams
From : RollingMachine
To : RollingOutput
Data : 1
You’re done with this thing. Let’s move on.
RollingInput1
This is perhaps the most difficult one, as you need to add a few things to it’s properties. So, let’s do that first. Open up properties, and add Attributes (Physics>Model>Attributes) If it’s not like this already, then change everything to be like this, and change nothing else.
Gravity : 100.00
Mass : 30.00
Density : 1.00
Base Friction : 0.96
Time to add something else. In that same category you found Attributes in, add Controls. If it’s not like this already, change it.
Location, Rotation for the button on that thing that popped up.
And Dimensions, but nothing needs to be changed.
And also State, nothing needs to be changed.
Type :
OBB for the top thing.
# Submodels : 6
(NOTE ! After adding Type, you may need to go back and look at the rest to make sure they’re what you want them to look like. The OBB & Submodels thing can change this, which is good.)
Now add a new thing, Misc. It’s in the properties area somewhere, find it ! (Yes, you actually have to put in your own effort here). Add Collision Type : Bounce
Now add Renderer, Transparency property. Set the transparency (alpha) to 0.01
And also : Renderer Type : Normal.
You’re done with the hardest part. Now, back to normalities, add the Script (S>Scripts) Script0 : "MachineSlot" (no quotes).
Now, with this RollingInput1 marker, widen it and fatten it so it’s the same width as your input area. Make it as tall as you wish, but I don’t recommend it being taller than the slot.
With that done, you can now link it to the machine.
Flavor : ScriptParams
From : RollingInput1
To : RollingMachine
Data : 1
RollingInput2
Do ALL the same things as above, except the link should look like this :
Flavor : ScriptParams
From : RollingInput2
To : RollingMachine
Data : 2
RollingOutput
Don’t add anything to this.
(Note ! Put this where you want the item to pop out !)
You’re done ! Now all you need to do is create the FlareMixture and the PlateO’Metal, put them where you can find them, and a button.
With the button, add this link :
Flavor : ControlDevice
From : [Button id #)
To : RollingMachine
Throw the FlareMixture and the PlateO’Metal (Metal Plate) in the slots, push the button, and you’ve got yourself a flare. Now, you’ve got a Rolling Machine that works.
Final Note : You may notice this : One slot will only work for the Flare Mixture. This is RollingInput1. RollingInput2 is for the PlateO’Metal (Metal Plate). So basically, the gunk that goes in the flare goes in Input1, the actual flare "housing" (metal plate) goes in Input2, to be rolled together to make a flare. Putting the Metal Plate in Input1 does not make a flare if you put the mixture in Input2. Nor does it work if you throw both of them in the same slot. Duh.
Sealing Machine Tutorial :
Alright, first off, create what you want to be the machine. This is very simple. Just to be simplistic, create a square solid brush small enough so you can mantle onto it, so you don’t have to make a ladder. Dress it up however you wish, it’s yours to play with. Put two air brushes in this solid brush, however big as you’d like, as these don’t matter to the sealing machine process. These will be what you throw the things into that you want to be sealed.
Create another hole if you wish, out of an air brush, or even a chute of some sort. This will be what the product will come out of when sealed, so make sure you put it somewhere that will let the thing fall on the ground so you can go get it. With that done, it’s time to start the hard parts.
Make sure you have all the following scripts loaded : Convict, Gen, miss16.
Now...
You will need the following things :
*A marker (Name it SealingMachine)
*Another marker (Name it SealingMachineInput1)
*Again, a marker (Name it SealingMachineInput2
*Yet another marker (Name it SealingMachineOutput1)
*One more marker (Name it SealingMachineOutput2)
*A button
*A RegRound (Look under Manufacture in the hierarchy)
*A HIPStage2 (In the HomingInProgress directory, in the hierarchy)
Now we begin.
SealingMachine
With the SealingMachine marker, add the property Script (S>Scripts), and in Script0 add "SealingMachine". (without the quotes) That’s all you need to do here. Now, open up links and add the following Link :
Flavor : ScriptParams
From : SealingMachine
To : SealingMachineOutput1
Data : 1
And another one...
Flavor : ScriptParams
From : SealingMachine
To : SealingMachineOutput2
Data : 2
You’re done with this thing. Let’s move on.
SealingMachineInput1
This is perhaps the most difficult one, as you need to add a few things to it’s properties. So, let’s do that first. Open up properties, and add Attributes (Physics>Model>Attributes) If it’s not like this already, then change everything to be like this, and change nothing else.
Gravity : 100.00
Mass : 30.00
Density : 1.00
Base Friction : 0.96
Time to add something else. In that same category you found Attributes in, add Controls. If it’s not like this already, change it.
Location, Rotation for the button on that thing that popped up.
And Dimensions, but nothing needs to be changed.
And also State, nothing needs to be changed.
Type :
OBB for the top thing.
# Submodels : 6
(NOTE ! After adding Type, you may need to go back and look at the rest to make sure they’re what you want them to look like. The OBB & Submodels thing can change this, which is good.)
Now add a new thing, Misc. It’s in the properties area somewhere, find it ! (Yes, you actually have to put in your own effort here). Add Collision Type : Bounce
Now add Renderer, Transparency property. Set the transparency to alpha, 0.01
And also : Renderer Type : Normal.
You’re done with the hardest part. Now, back to normalities, add the Script (S>Scripts) Script0 : "MachineSlot" (no quotes).
Now, with this SealingMachineInput1 marker, widen it and fatten it so it’s the same width as your input area. Make it as tall as you wish, but I don’t recommend it being too tall.
With that done, you can now link it to the machine.
Flavor : ScriptParams
From : SealingMachineInput1
To : SealingMachine
Data : 1
SealingMachineInput2
Do ALL the same things as above, except the link should look like this :
Flavor : ScriptParams
From : SealingMachineInput2
To : SealingMachine
Data : 2
SealingMachineOutput1
Don’t add anything to this.
SealingMachineOutput2
Nothing here, either.
(NOTE ! Put these BOTH where you want the item to pop out !)
You’re done ! Now all you need to do is create the RegRound and the HIPStage2, put them where you can find them, and a button.
With the button, add this link :
Flavor : ControlDevice
From : [button id #)
To : (sealingmachine id #)
Throw the RegRound and the HIPStage2 in the slot, push the button, and take a look at that handy thing you got. Now, you’ve got yourself a Sealing Machine that works.